Description
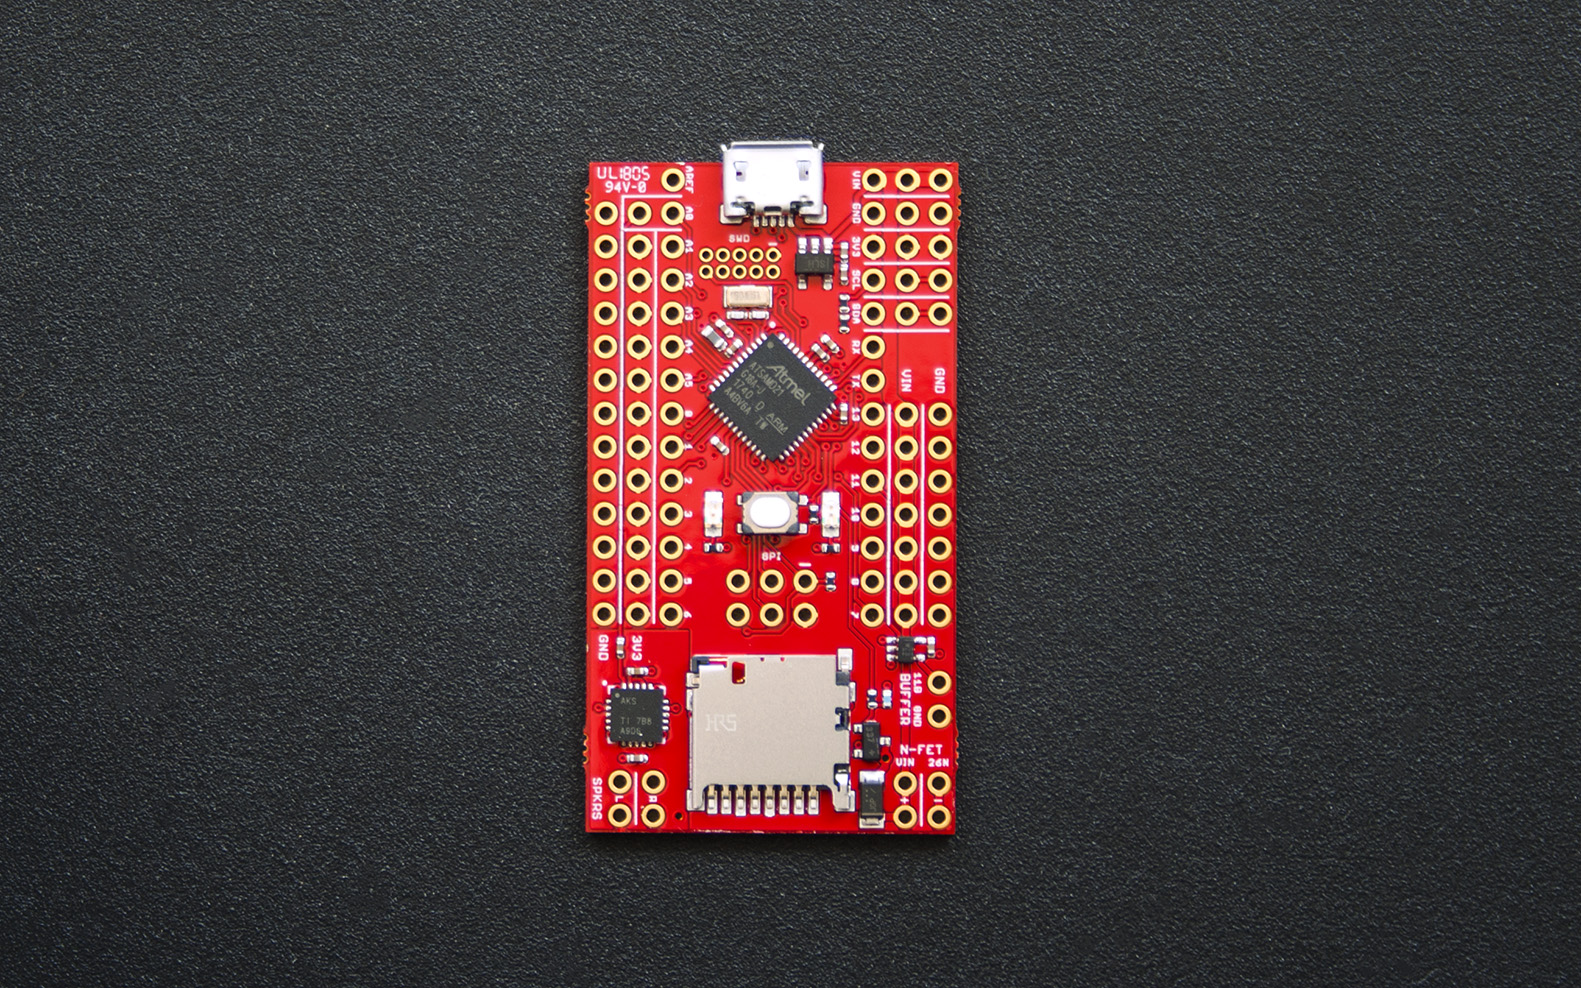
The Firecricket XL is an Arduino compatible light, sound, and motion controller featuring a 48MHz 32-bit ARM Cortex M0+ microcontroller w/ 32K of RAM, a MicroSD slot so you can store sound effects, bitmaps, and configuration files, a 2W stereo audio amplifier*, and an N-FET w/ flyback diode for driving high current inductive loads, like vibration motors or high power LEDs, and a 5V logic buffer for controlling strings of WS2812 Neopixel LEDs!
(* Both channels of the amplifier are connected to the same DAC, so the output is still mono, but two speakers gives you twice the volume!)
Designed to add light, sound, and motion to replica props from your favorite movies, video games, TV shows, and comics, it’s a must have for any cosplayer or anyone who wants to add some extra flair to their Halloween costume or decorations!
Use it to add lights and sounds to a toy car or space ship. Or, make a favorite stuffed animal talk and “purr” with a vibration motor. Or, place it in a chest with a limit switch on the lid and a high power LED and have it play the fanfare from the Legend of Zelda whenever it’s opened. The possibilities are endless!
And being open-source, you’re free to modify it as you wish and integrate it into your own designs – without ever needing to pay any royalties or licensing fees!
Technical Specs
- Microcontroller: Atmel ATSAMD21G18A ARM Cortex M0+
- Clock speed: 48 MHz
- Operating voltage: 3.3V
- I/O pin limits: 3.3V, 3 mA (7mA w/ strong drive enabled)
- Digital I/O pins: 14 w/ 12 PWM channels + I2C (SDA/SCL) + UART (RX/TX)
- Analog inputs: 5 12-bit ADC channels
- Analog outputs: 1 10-bit DAC
- Flash (program) memory: 256K
- RAM: 32K
- Voltage regulator: TLV702, 3.5V – 5.5V input / 3.3V, 300mA output
- PCB Dimensions: 2.0″ x 1.1″ (51 x 28mm)
- Amplifier: TPA2012D2, 2W into 4Ω x 2 w/ 5V supply
- N-FET + Flyback diode: FDN337N + SS24FL, 30V 2A max
- Buffer: SN74LV1T125SC70
Installation
To use the Firecricket XL in the Arduino IDE, first install the board files for the Arduino Zero from the boards menu. The board will then be detected as a Zero on one of the COM ports automatically when you plug it in.
Then, to program it, you should select the Zero’s NATIVE port on the boards menu.
The reason the PROGRAMMING port isn’t used is because that’s connected to a second debug chip on the Zero which the Firecricket XL doesn’t feature because the IDE doesn’t support it!
Documentation
Demo
http://rabidprototypes.com/FirecricketXL/FirecricketXL-Demo.zip
The Adafruit libraries the demo utilizes can be downloaded through the library manager in the IDE, while the SDFat lib required by the SamdAudio library included with the demo can be found here:
https://github.com/greiman/SdFat
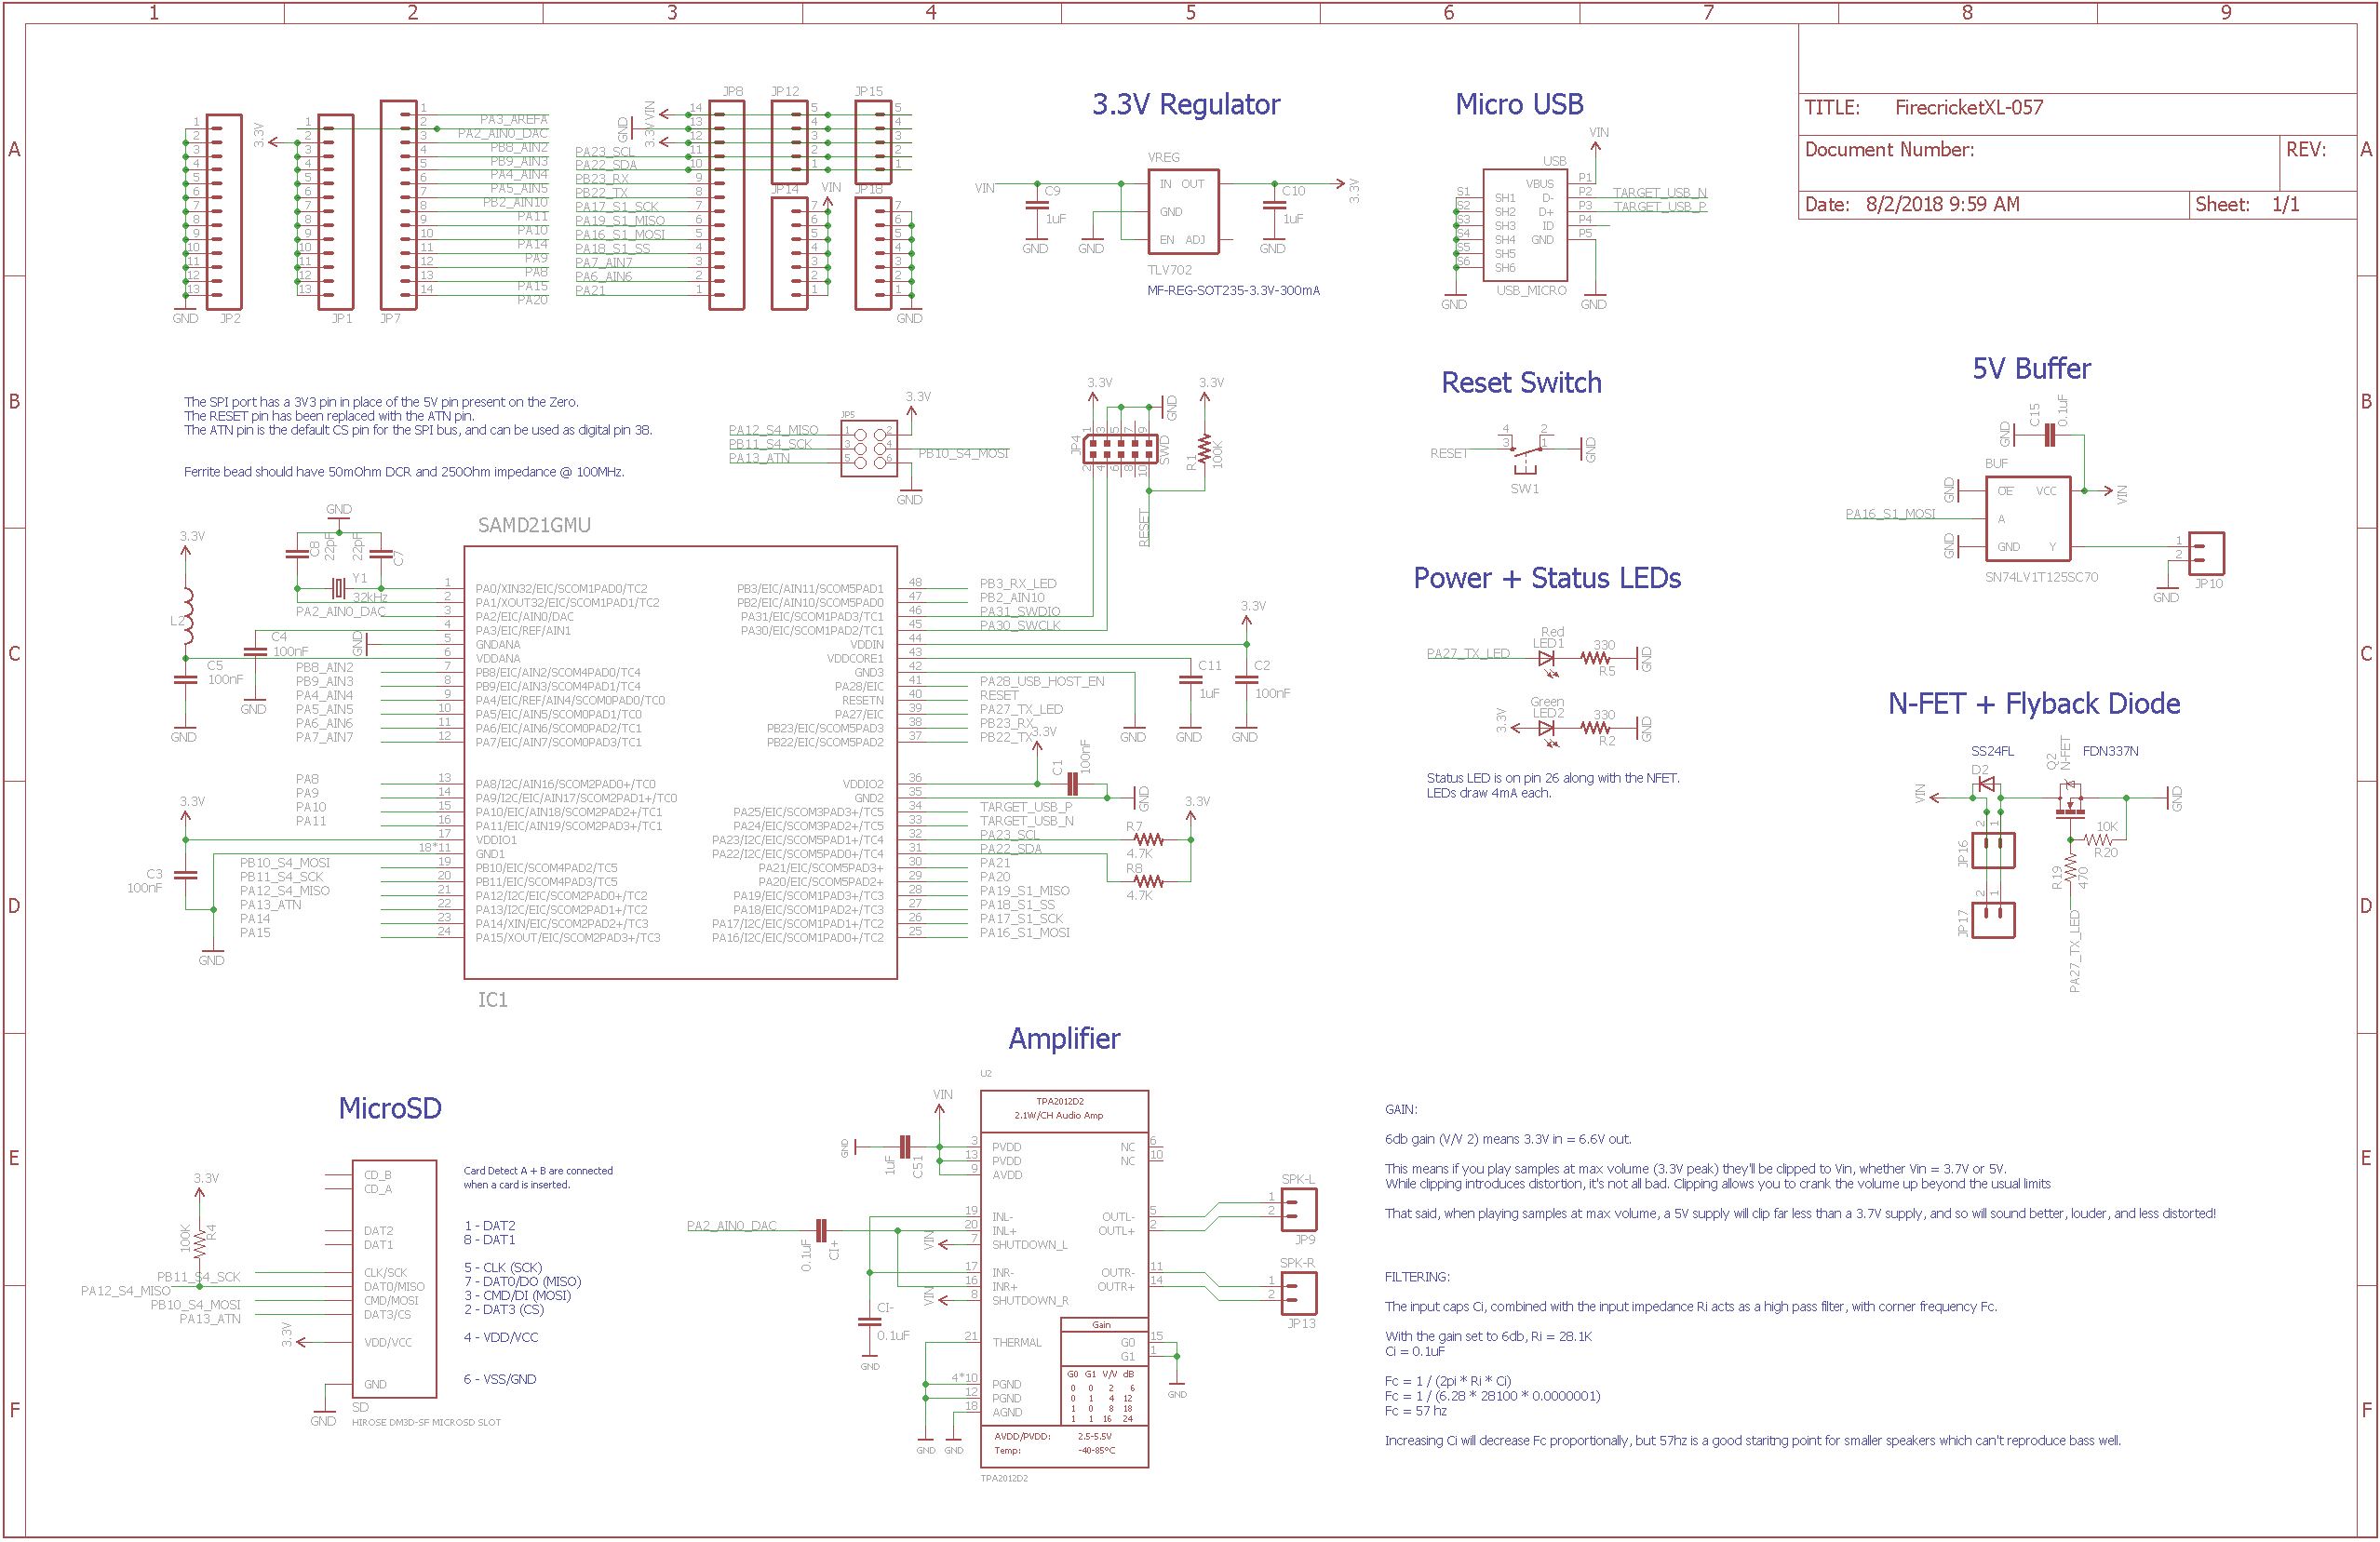
Schematics
http://rabidprototypes.com/FirecricketXL/FirecricketXL-Eagle.zip
http://rabidprototypes.com/wp-content/uploads/2018/08/FirecricketXL-Schematic.png
Troubleshooting
If you ever find that you cannot program your board, chances are your program has locked up, rendering the microcontroller incapable of polling the USB port for a serial connection. In this case, simply double tap the reset button, which will force the board to remain in bootloader mode until it is reset again, or reprogrammed.


Reviews
There are no reviews yet.