Hey guys,
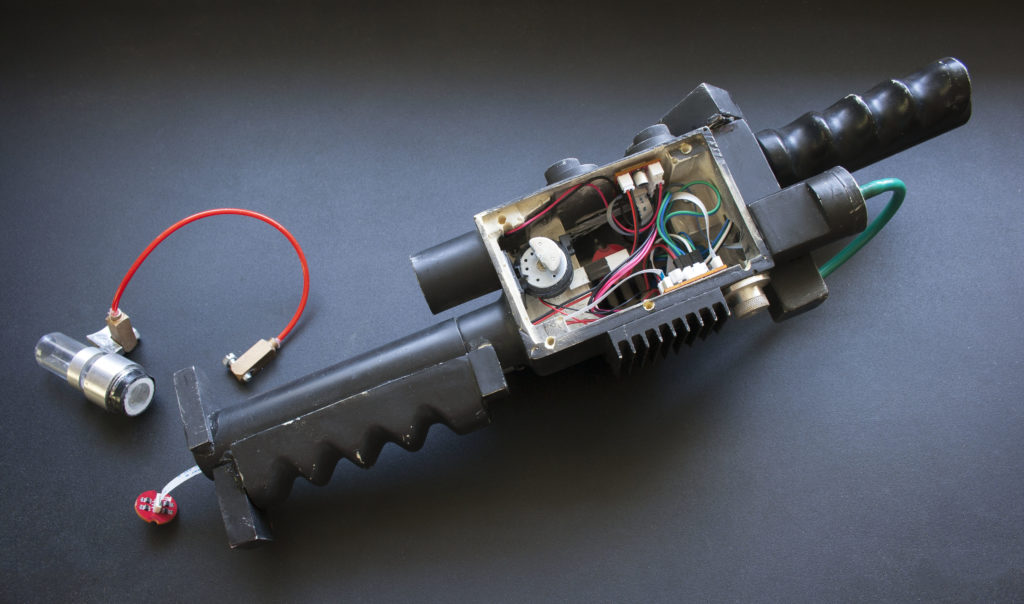
Just thought I’d post some photos of what it looks like when you install the Positron kit in your thrower:
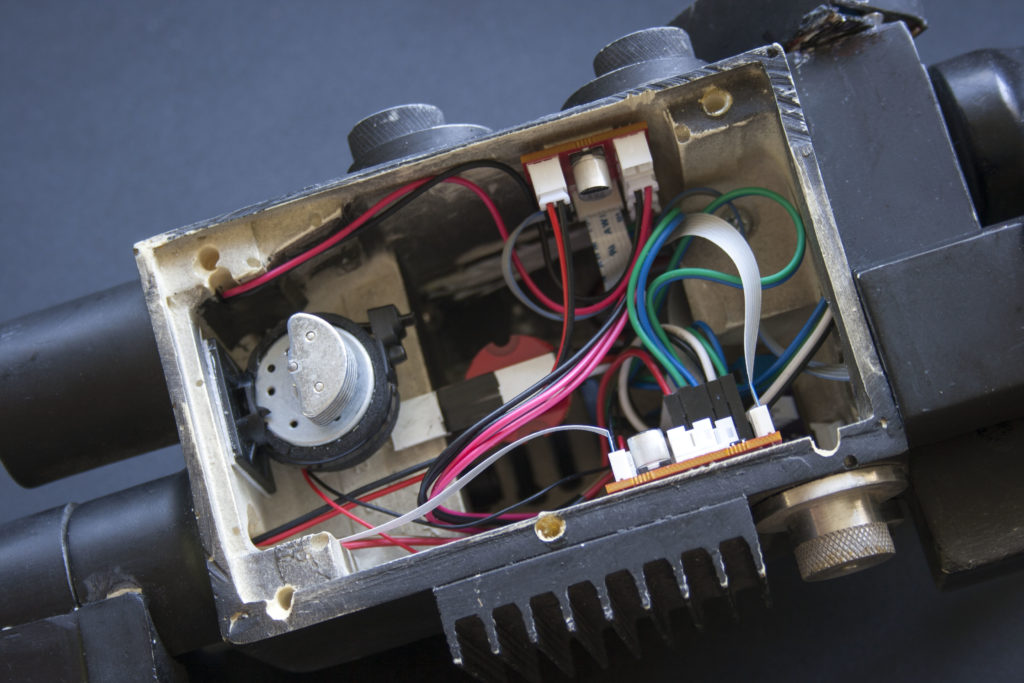
Note that this install was an upgrade, so I used the original switches that were already in place with their original wires. I know many of you will be upgrading, so I used the same type of connectors for those. The LEDs you’ll want to replace, since the new ones are soldered onto the wires instead of being in those sockets that they would often fall out of.
Also note that this install includes the optional super bright grille light. Normally, I would recommend you find or make some kind of reflector to put in the grille to protect the electronics from the elements but here since I was pressed for time, I just installed it on a little plastic tab by the vibration motor that I attached with double sided foam tape.
In addition, I’d like to point out the screw that is holding the rear handle in place. Your thrower may not have a screw there, but you should take note of any metal bits that may come into contact with the PCBs. In this case I had to trim that screw to make it shorter and then I put a couple layers of tape over where it is inside the handle because the extension module that connects to the Cat5 cable and provides connections for those white flat flex cables and the super bright grille light sits inside the handle. Alternatively, I could have gotten some large diameter heat shrink and heat shrunk that module but that would have made it impossible to unplug any of the cables from it later. If you have a metal thrower I suggest using two layers of double sided foam tape to protect the underside of the PCBs. I have used that here to attach the boards to the sides.
Finally, I’d like to draw your attention to the strobe at the front of the thrower. You can see there’s some slack in the cable even with the switch module that it connects to all the way at the rear of the thrower so you can remove the tip and unplug it if need be. The strobe should be placed flush against the rear of the acrylic tube, or the metal ring that holds it in place in the end of the handle. It can be glued in place, or you can simply tape it in place, unless you have a tip extension mechanism in which case glue would probably be best. For maximum brightness, make sure you don’t push the acrylic tube way into the handle with the strobe on the end of it. You want the strobe to be as close to the end of the handle as possible, and that’s when it’s butted right up against that metal ring.
You may also have noticed the acrylic tube here is much shorter than usual. Yours doesn’t need to be that short – that’s just how the owner of this pack likes it!
Oh, and the strobe is slightly smaller than the diameter of the acrylic tube, so if you have a tip extension mechanism with a metal tube that slips over the acrylic tube the strobe should fit inside it, no problem.


